All my life, I've been a creative person. Not just with writing, but reading and art. I used to love doing Paint by Numbers, which was a great activity to help me with my nerve damage. My hands shook quite a lot, when it got worse, so that had to stop. So I turned to jigsaw puzzles - not tiny little ones, but big massive 1000 or more pieces that took weeks. But, then my nerve damage for bad again and I'd end up in a mess or with unfinished pieces - or a mountain of finished jigsaw that had nowhere to go.
A great new thing that is compact, easy to use and can be carried around with you, are Adult Colouring Books. All the rage now, it's easier to find something that appeals to you. From movie related - Harry Potter etc - to elaborate designs or animals, there's a little something for everyone.
Want to write a novel, but can’t find the time and don’t know where to start? Then, this is the book for you! Write Now! How to Write a Novel in Your Spare Time, Even if You’re Busy! is a step-by-step guide, designed to help you set a writing schedule, create a personalized writing plan, and find the time to write in your spare time, whether you are a novice or an experienced writer.
Not only will Write Now! guide you through the process of creating a writing plan tailored to your needs, it is also a comprehensive guide to writing fiction, taking you from your pre-writing activity through to publishing.
In this book, the author speaks directly to the reader, using examples as she goes, and also includes examples of outlines, a character analysis, a story map, and more, ensuring your success on your writing journey. So, if you have ever wanted to write a novel or are having a hard time finding the time to write and don’t know where to start, then this book will help you to Write Now!
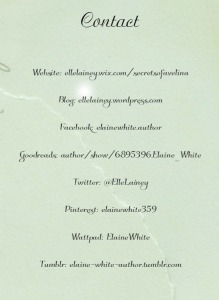
Every author should have a portfolio of work. Whether this is just a website or an extensive paper form, there are really cheap ways to do this, that still look profession. Why is it important? Because your readers need a way to view your work and get to know you. Also, it's good to keep in mind that a lot of people don't have Facebook, so try to make yourself available on as many avenues as possible.
Today, I'm going to talk about a paper portfolio. This is great for book signings or just something to carry in your bag, for those moments when you're asked about your work. It's so much easier to get someone interested in your books if they can see a cover or read a blurb, immediately than it does to show them a business card. Inevitably, they get shoved in a pocket/bag and forgotten about. Visually, it's harder to forget a great cover or a phrase from a blurb that intrigued you. People are, scientifically, more likely to remember something they see than something they're only told about.
~
My recent project was to take one of those booklets that come with collectable cards and turn it into a portfolio.
How? Well, it's pretty easy. It does take up a lot of paper (plain or photo - your choice) and lots of printing, but it's well worth it. Plus, you end up with a visually pleasing booklet of your work, that is protected from damage, greasy/dirty fingers and wear and tear.
I got mine recently, from the Minions explosion that's been happening. It was easy to pick up the "starter pack" which was a magazine, with cards and the binder. I did this for the binder, because it's cheaper to pay £4-£5 for this starter pack than to try to find one available elsewhere. These packs are aimed at kids, with pocket money, while individual items are aimed at adults who make a wage. Unfair, but true. Plus, you can gift the rest of the pack to a family kid, so it's not a total waste. (You can buy these in most newsagents/news paper stores, especially supermarkets, at the magazine section)
~
After buying your pack, it's a simple matter of taking measurements. I measures the Minions insert, for the front cover and the size of one of the cards, for the inserts inside. As it's designed for individual cards, you can actually fit +250 inside one book. This is great, because my plan is to make 1 card for the series/book with the blurb on it, then one card with the book cover. When you don't have much to put in it, you can fill the back with extra business cards (to hand out), character cards and extras, that are all easy to fit in the slots, for those emergency moments.
So, the measurements for this Minion pack are as follows:
Front/Back Cover = W: 14cm H: 19.2cm
Inserts = W: 6.2cm H: 8.8cm
I'm sticking with this, as this allows some wiggle room on either side as well as being accessible if they need changed or rearranged. I'm also arranging mine my series, as there's so much space.
If you're using another size of folder, you can convert to pixels (which Picmonkey uses for size) here at Unit Conversations.
~
Phase 1: Front and Back covers
The front cover will be simple: my logo, with a background of some sort, on the front. On the flip side, will be my bio. The back cover will be similar: an image related to me or my writing, then on the flip side, a list of all my books. These two pages can be updated as and when needed.
Example:
~
Phase 2: The guts.
For this, I'll be making one Blurb for each solo novel or for each series. Then I'll make one card for each book cover in that series or for that novel.
Example:
I have to print, to check that the writing can be read on the blurb. But, the great thing is that it's easy to fix.
~
Phase 3: Insert into Doc
The easiest and simplest way to print these is to insert each into a word document. Keep them at their natural size, but if they change, it's easy to right click each picture, to re-set the size to the above measurements.
~
Phase 4: Print
You can do this on photo paper (for that clear, crystal, professional look) or on plain paper. As this will be an every day item, for events, hopefully manhandled a lot, and in a protective cover, the choice is totally up to you. You can be economic, in using plain paper, knowing that you might have to update it a lot or that it might get dirty. Or you can go all out with the photo paper for a sturdier book.
~
Phase 5: Share!
Take it with you everywhere. The size of this little book makes that easier on you, since it's not a massive A4 folder. Even if it's just to have those extra character cards or business cards on hand, it will always come in handy.
Sometimes you have to write about a physio, someone with an injury or medical knowledge that you don't have the first clue about. So, here's some tips that will help you get the knowledge you might need.
You should all know that you need to stretch, whether you are a chronic sitter, a weekend warrior, or a daily exerciser. Stretching helps your blood reach your muscles and your joints move through their full range of motion, but it also improves your posture and athletic performance and reduces the risk of injuries and pain.
How do you know which muscles you are actually stretching or if you are performing each stretch the right way while you do yoga or the flexibility routine?
Well, here is a little knowledge on the topic, and having this in your back pocket, you can opt for the best stretches that best fit your goals. In case you start feeling pain, and not the regular, good pain, but the stretchy one when you know that something does not feel right, you should pinpoint the muscle that gives you the trouble and change the technique you have been using in order to avoid getting injured.
These stretches should be felt in the belly of your muscle. However, you should not feel pressure or strain in your joints, and if you do, it means that you are pushing too far. During the stretching, concentrate on your breathing and make sure these movements are as natural as possible.
Stop thinking about the time you are holding the stretch, but instead, start concentrating on feeling your muscles relaxing and returning to their natural, resting length. This may take about five to thirty seconds. If a stretch does not feel like it is doing something for your body muscles, change it and try another one.
The beautiful illustrations we present you are made by Vicky Timon, a yoga expert and author of “Encyclopedia of Pilates Exercises”, and James Kilgallon, CSCS, creator of Mazio’s Body Maintenance Program, contributed by giving the expert commentary.
1. Camel Pose
Muscles emphasized: Rectus Abdominus and External Obliques. This stretch is though most appropriate for people who already have a good flexibility. Sitting on your heels, put your hands behind you, pushing your hips up and forward. Do not put too much pressure on your lumbar spine. Also, in case you have problems with your neck, do not drop your head back.
2. Wide Forward Fold
Muscles emphasized: adductors. This exercise is great for stretching the adductors and the hamstrings, and you just need to open the hips. Start with your knees bent, holding your spine straight. As you start feeling your muscles starting to release, straighten your legs, round out your back and reach for your feet. Pull easily on the bottom of the balls of your feet in order to release the calf muscles. If you are beginner, you might not be able to reach your feet, so then you will need to use a belt or a towel. This stretch can also be performed while you lye on your back and push your legs up the wall.
3. Frog Pose
Muscles emphasized: adductors. This stretch for your groins can put pressure on your knees as well, so it is recommended that you perform it on a soft surface. Rest your hands and knees, and then bring your knees wider until you feel your groin muscles well stretched. You will feel a bit differing stretches as you actively push your hips back and forward.
4. Wide Side Lunge Pose
Muscles emphasized: adductors. Begin by putting your both feet forward in a wide stance, holding your legs as straight as possible. With your hands, walk to your right foot and then bend your right knee and rotate your left toes up to the ceiling, sitting in your right hip. Make sure your right foot maintains flat on the ground.
5. Butterfly Stretch
Muscles emphasized: adductors. Sitting, bring the soles of your feet together and sit tall through your sit bones. Develop this stretch by putting pressure on your knees, using your hands. If you want to stretch your groin muscles better, hold your feet closer to your body. Now, make sure your feet are far from your hips and slowly round your upper body to loose your back muscles.
6. Forearm Extensor Stretch
Muscles emphasized: Forearm extensor. Pack your shoulders and your back down and rotate the shoulder towards outside in order to get into the optimal position to stretch the forearm muscle. After you have managed to bring your body into this position, put pressure on your other hand to start the stretch. You can develop this stretch by touching the tips of your fingers together in the shape of a tea cup.
7. Lateral Side Flexion of the Neck
Muscles emphasized: sternocleidomastoid “SCM”. Prolong your neck as much as possible and slowly drop your ear to your shoulder, ensuring that you are not collapsing your cervical spine. This stretch can be further developed and advanced by sitting on a chair and holding onto the bottom of the seat. This is going to make the tension down your arm and neck consistent, and thus it will let you target the upper traps.
8. Neck Rotation Stretch
Muscles emphasized: sternocleidomastoid “SCM”. Begin by rotating your neck in a slow manner, while keeping your chin a bit elevated to isolate the SCM. For a deeper stretch, you will need to put pressure with the opposite hand from the direction that you are rotating.
9. Neck Extension Stretch
Muscles emphasized: sternocleidomastoid “SCM”. Begin by putting your hands on your hips, and in meantime, keep your spine long start to tilt your head back, ensuring that you are not collapsing your cervical spine.
10. Lateral Side Flexion of the Neck with Hand Assistance
Muscles emphasized: sternocleidomastoid “SCM” and upper trapezius. Prolong your neck as much as possible while you slowly drop your ear to your shoulder. While you do this, make sure you are not collapsing your cervical spine. Advance this stretch by sitting on a chair and grabbing the bottom of its seat. In this way, you will create consistent tension down the arm and the neck, and it will let you target the upper traps.
11. Half Kneeling Quad / Hip Flexor Stretch
Muscles emphasized: psoas and quadriceps. Begin in the position of half-kneeling. Then you should bring forward the right hip, and you should also start feeling a stretch in the front of your hip while you do that. Take your back foot and squeeze your back glute in order to add to the stretch on your hip flexors.
12. Forearm Extensor Stretch
Muscles emphasized: forearm extensor. Begin by packing your shoulder and your back down. Next, rotate your shoulder towards outside to get into the optimal position to stretch the forearm muscle. When you have come into this position put pressure on your opposing hand to start the stretch. You can advance this stretch by touching the tips of your fingers together in the shape of a tea cup.
13. Lateral Shoulder Stretch
Muscles emphasized: side deltoid. With your arms across your body, put pressure on your arm to add to the stretch on your shoulder.
14. Standing Assisted Neck Flexion Stretch
Muscles emphasized: trapezius muscle. Stand on the ground with your feet together. Make sure your spine is prolonged and slowly sit your hips back and round your upper back, pushing your chin to your chest at the same time.
15. Lat Stretch with Spinal Traction
Muscles emphasized: latissimus dorsi. Begin by taking a firm grip on a bar and slowly lifting your feet off the ground. The stretch needs to be felt in your chest and lats. In case you have totally taken your feet off the ground, you will feel traction in your lumbar spine. If you have recently undergone a shoulder injury or you have impingement of the shoulder, do not perform this stretch.
16. Lat Stretch at the Wall
Muscles emphasized: latissimus dorsi. Put your both hands on the corner of a wall or post. Maintaining your spine prolonged, push your hips out to the side in a slow manner. If you have problems with your lower back, do not perform this stretch.
17. Child’s Pose
Muscles emphasized: latissimus dorsi. Being on the ground with your hands and your knees on the floor, slowly bring your hips back until your forehead is on the floor. If you want a better stretch in your hips, you should bring your knees wider. Your upper back should be positioned in the shape of an arch, and then you should externally rotate your shoulders to stretch your lats and chest muscles.
18. Standing Calf Stretch
Muscles emphasized: soleus and gastrocnemius. This stretch can be performed on a rack or on the edge of a stair step. Rotate your ankles a bit towards inside and outside to actively stretch your calf muscles.
19. Front Split
Muscles emphasized: psoas and hamstring. This stretch is not suitable for beginners, as it is kind of advanced, and it should be performed with caution, especially if you have any hip problems. Begin in a position of kneeling lunge. It can also be beneficial if you have the support of a chair while your hip flexors and hamstrings release.
20. Seated Forward Fold / Seated Toe Touch
Muscles emphasized: hamstrings and calfs. Sit into your seat bones and bend your knees if you need to. Your legs will become stronger as your flexibility gets better. Make sure your spine is as straight as possible, especially if you have back problems. This stretch can also be done lying down on the back, with your feet up the wall.
21. Single Led Forward Bend
Muscles emphasized: hamstrings. Begin by having your feet positioned one in front of the other. Keeping your back straight, bring your hands to your hips and start bending from the hips.
22. Deep Squat
Muscles emphasized: glutes. This movement has general impact on all areas of your body. If you have problems with your knees, or if you cannot keep your heels on the ground, perform your squat before proceeding. Begin by standing with your feet apart in the width of your shoulders and then start gradually lowering into the deep squat. When you get to the position of deep squat, bring your arms inside your legs and put a little pressure to the inside of your knees, sitting into the hips and heels. This stretch can also be performed lying on the back with the feet against a wall.
23. Seated Half King Pigeon Pose
Muscles emphasized: glutes. Begin in a seated position and gradually pull your leg to your chest and rotate your hip towards outside, while keeping your spine straight. This stretch should be felt in the glute.
24. Standing Calf Stretch at the Wall
Muscles emphasized: soleus and gastrocnemius. Initiate in the lunge position, having the back of your foot a bit turned out. Gradually bring the back of your heel to the floor to stretch your calf muscles.
25. Lateral Flexion at the Wall
Muscles emphasized: external obliques. Keep your spine prolonged and slowly push your hips outside. If you have troubles with your lower back, do not perform this stretch.
26. Supine Twist
Muscles emphasized: glutes and external obliques. This stretch is especially good and beneficial for people who suffer from sciatica pain and try to get rid of it. Begin by lying flat on your back and then bring one leg across your body, and gradually rotate your gaze and upper body in the opposite direction. What’s important about this stretch is the fact that you use your breath to open up your rib cage and sacroiliac joint and hip area without putting too much pressure on the lower back. If this stretch is too hard for you, stack both of your knees on top of each other, and when you are positioned this way you will feel more stretch on the upper spine when the knees are higher, and more stretch on the lumbar spine when the knees are lower.
27. Lateral Flexion with a Dowel
Muscles emphasized: external obliques and latissimus dorsi. Keeping your spine long, gradually push your hips out to the side while keeping your shoulders rotated outwardly. In case you have problems with your lower back, do not perform this stretch.
28. Triangle Pose
Muscles emphasized: external obliques. Begin with a wide stand and with your front foot straight ahead, and your back foot at 90 degrees. Put your hand on your front leg or on the floor, and sit back into your front hip, keeping your back straight. Rotate away from your front leg and maintain your look on the hand that it is in the air.
29. Chest Stretch at the Wall
Muscles emphasized: pectorals. For starters, face the wall with your thumb up. Gradually rotate away from the wall in order to stretch your chest muscle. This stretch should be felt in the belly of the muscle, but be careful not to stretch too far, as it will result in a pain in the shoulder joint.
30. Assisted Chest Stretch
Muscles emphasized: chest and latissimus dorsi. Begin by lying down on the floor and holding your palms faced up. Your partner should be seated in a deep squat and hold your hands, thus, you are supposed to feel a stretch in your chest and lats. The stretch should also cause some traction in your spine. If you have shoulder impingement, do not perform this stretch.
31. Seated half Pigeon Variation
Muscles emphasized: anterior tibialis. Begin by sitting with your feet positioned in front of you. Put one hand behind you and rotate your hip outwardly and put one foot above your knee. If you want to add to the stretch on your hip, gradually lean forwardly and start the movement by hinging at the hips.
32. Supine Shoulder External Rotation Stretch
Muscles emphasized: subscapularis. Begin by lying flat on your back. Then, place your arm straight out to the side with your elbow at an angle of 90 degrees. Next, gradually bring the back of your hand to the floor. If you cannot bring your hand close to the floor, and it is still far away, it means that your rotator cuff and other muscles that control internal rotation are tight.
33. Down Dog Variation at the Wall
Muscles emphasized: pectorals and latissimus dorsi. Stand far enough from a wall or rack so that when you touch the wall your body gets into parallel position to the ground. Move into this position by pivoting at the hips and make sure your spine is straight all the time. Once in this position, move your chest forward and make a slight arch in your upper back and stretch your lats and chest muscles. If your hamstrings are tight, try bending at the knees.
34. Assisted Chest Stretch Variation
Muscles emphasized: pectorals. Lye down on the floor with your face down and your palms faced down. Your partner should pull your hands back and you should feel a deep stretch in your chest muscles. In case you have a shoulder impingement, do not perform this stretch.
Don’t Forget To Share With Your Friends And Family On Facebook, And Check Our Youtube Chanel If You Want To See This Article In The Form Of Video!