
In this new tutorial, we'll be looking at the video making site, Animoto. There's an alternative "Windows Media Makes", which I'll be looking at later.
~
The first thing about Animoto is that you want to buy a plan. This all depends on how deep your pockets are and what you're looking for. I'm lucky enough to use them for free, thanks to my publishers. However, here are the price plans:
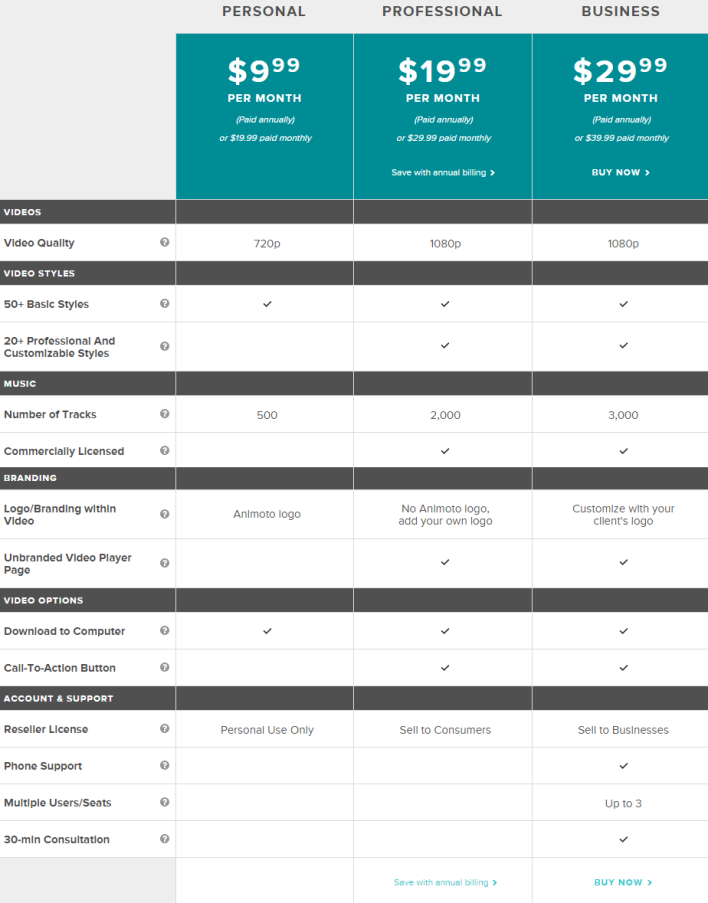
~
Now that we've got that covered, let's look at HOW to make a video.
First, you want to choose a theme. Click "Create" in the top right hand corner of your Dashboard and let's see what's on offer:
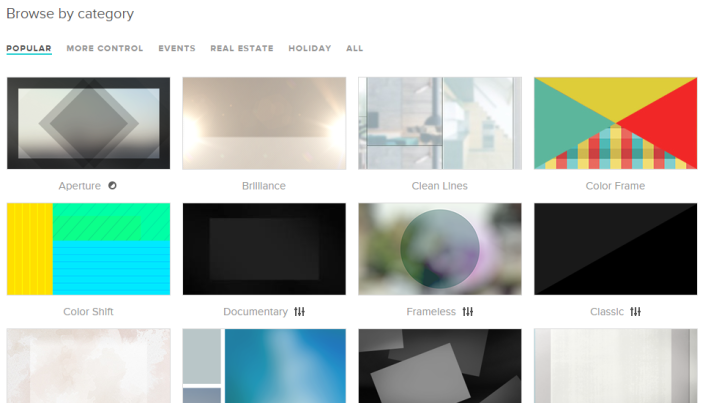
This is all about personal choice and what theme you want your book trailer to have. If you click on each small theme, it will give you a larger view and play a pre-made video to show you how the theme will look when in use. Once you've chosen one, click "Create Video". For this post, I'll be using the "Simply Stated" theme.
~
Here's your page, where you can add all your information to your theme.
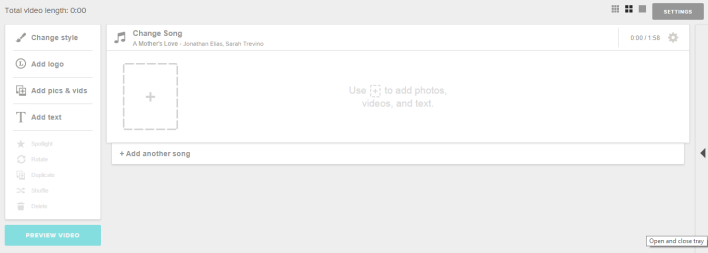
The first thing you want to do, once you have your theme, is choose a song. Again, this is personal choice and there is so much choice that it can be dizzying. But, the right song can make your book trailer. And don't worry about legal use, because Animoto take care of all of that for you. They only provide songs that are legally allowed to be used for a book trailer, so you have nothing to worry about!
Most themes come with a set playlist. But, you don't have to stick to it. Click "Change Song" to change the song.
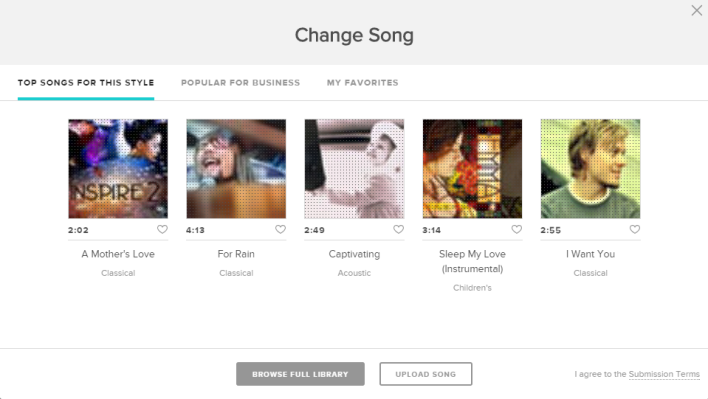
Each song on the list has a play button that you can use to sample it before choosing. Try the songs suggested, using the this option or go looking for another option. You can upload your own songs or a song from YouTube's Audio Library, as long as you remember to credit it in your video.
If you click "Browse Full Library" you can view the entire selection that Animoto offer and sort by length, style, artist or song title.
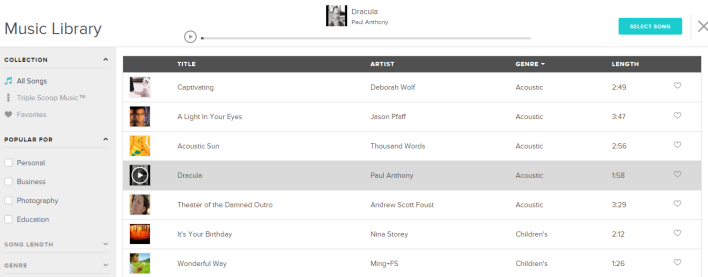
Simple click the song you want to use instead and choose "Select Song" or stick with the original option by clicking the X.
~
Once you've got your music sorted, let's look at how to add images. You can use the large box with an X in it to add images or text (see image) or you can click the "Add pics and vids" or "Add text" box on the left menu.
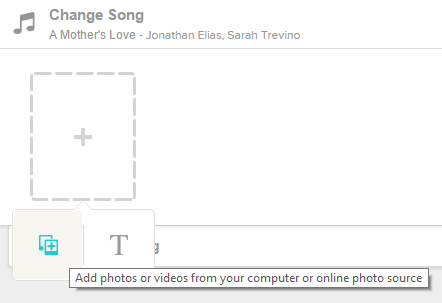
The choice is yours. Once you get there, you can add images from Animoto's image library or from your own computer. If you choose your own computer, make sure the images are legally allowed to be used for Commercial Use, which is what your book trailer will be. Also, it's best to add one frame on the end letting people know where your images were taken from, e.g. All images purchased or from Pixabay, is what I usually use.
Here's Animoto's library:
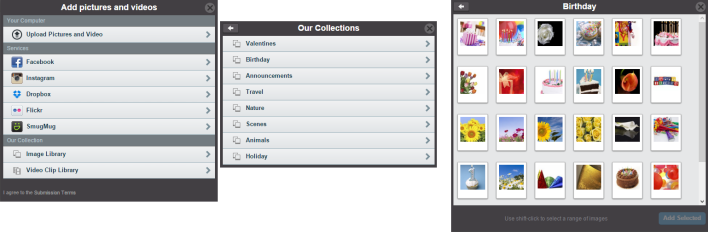
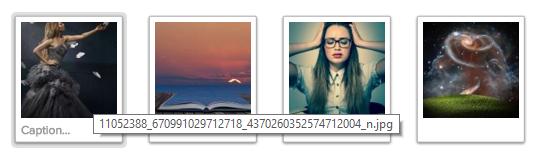
For the purpose of this example, I've chosen some random images from my computer, all licensed for Commercial Use.
~
Now it's time to add text. There are two ways to do this: 1) use the Add Text button or hover over the image you want to write over and you'll see the word "Caption" appear on the bottom of the picture's frame:
I use the 'Caption' option, as it allows me to add text to each individual picture as and how I feel. Here's what you'll see once you click 'Caption'.
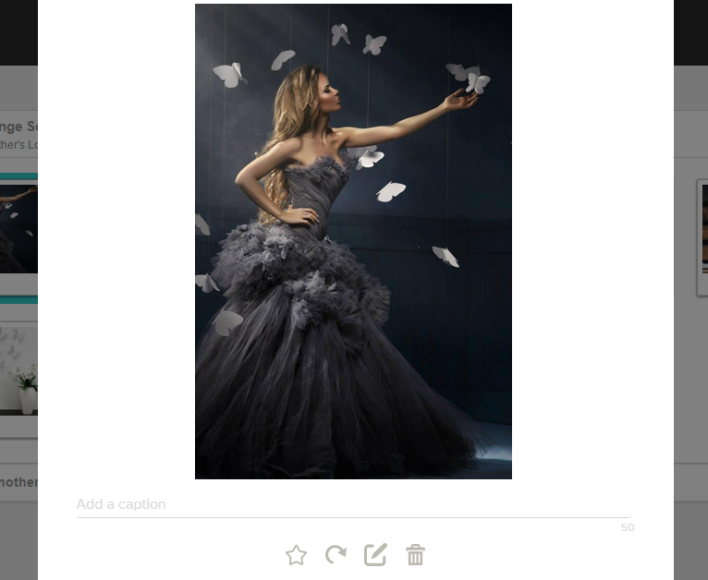
At the bottom, you'll see a bunch of symbols. From right to left: Spotlight, Rotate, Edit Photo, Delete Image.
You can see the one line where you can add text. At the other side, you'll see the number 50: this is your character limit! It's like Twitter in that you have to say what you want to say in as few words as possible. This isn't just about space or getting to the point, this is about how long people have to sit at a computer and focus on words. No one wants to sit and watch a 5-10 min video about your book, that they haven't read, because you have so much text that you had to add more images to make room for it. Your total video length should be between 1 and 2.5 mins. You're not making a movie.
~
Once you've added text to all the images you want to, and you decide you want to change the order of things, it's really easy. All you need to do is click and drag your picture to where you want it:
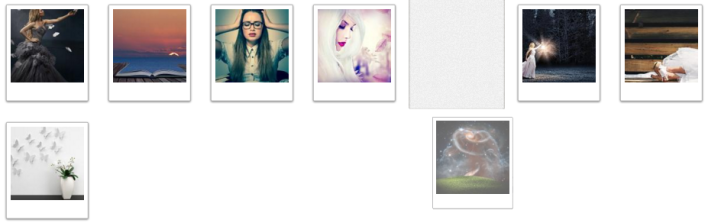
I've moved this image into a blank space to show you how it will look. Say you want to move it behind the image on the left, of the girl with white hair. Simple, just keep dragging it across until the image moves:

This is literally how it happens: one minute you're moving the space image and the next the girl with white hair has moved. Very simple and easy. You can do this as many times as you need to, until you have everything where you want it. Moving the captions is the same: open the image (the way you did when you added the caption) and highlight the text. Then copy and paste (Ctr+C) and close the image, then paste your text into the box you really want it in. It can get a little fiddly if you want to completely switch the text of two boxes. If you want to do this, it would be easier to re-add the image, to give yourself a blank caption box to add your text to. This way, you're not deleting a line of caption that you want to keep for another picture. Believe me, I've done it and it's annoying. Especially when you had it perfectly worded to fit the 50 characters.
~
Well, now that you've got everything in order, let's check out the preview. Click "Preview Video". This is where you can see how your images and text appear on the theme you've picked.

Here's how the video looks with text and image together:
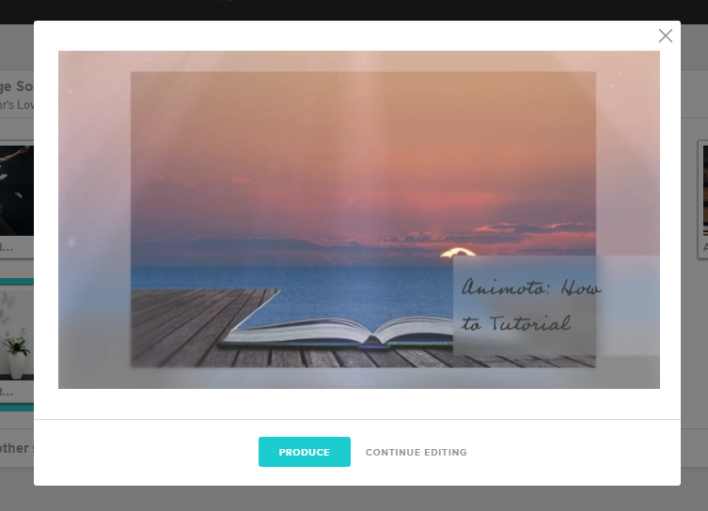
Personally, I don't like it. The theme makes this image look hazy and dims the colours. Also, the text is a little too cursive for easy reading. You have to remember that most people will be reading on a small screen (phone, ipad, computer, tablet) and might not bother to squint or lean close to read text this small or cursive.
Don't like your theme, after all? No problem. Exit the preview by either clicking "Continue Editing" or the little X on the top right corner of the box. Then, in the top left corner, you'll see "Change Style". Click that.
I'm going to change mine to "Clean Lines", because that theme is a little more tricky to work with.
Here's how the same images and text looks in the new theme. Much better!
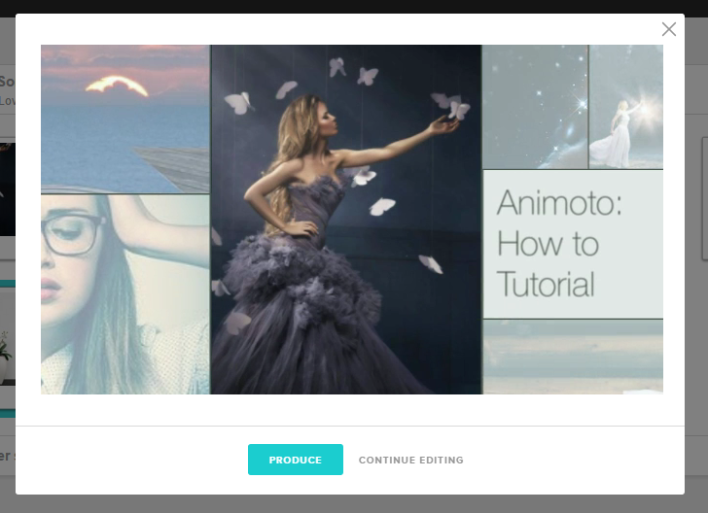
This is one of my favourite themes, because I love the way that it shows all images faded in the background, while popping one image at a time. I also love the way it focuses on the writing and has it large and easily readable.
But, there is one problem with this theme: layout! I had to deal with this recently, on my last video, and there's no simple solution. Check out this image below:
Ideally, you'd want the text box on the right, correct? Well, you can't move that. So you flip the picture, right? Nope. I tried this on another video, previously, and every time I flipped the picture to suit the text box, the text box moved. Unless you have a particular item in the image that you want to focus on, I'd recommend not worrying about this. The text boxes move, on large images like this, to a different spot every time it is played. It's going to move no matter what you do, so I suggest that you either live with it or crop your image to a poster size (similar to the first image). These images are always centred and the text is always placed on the right or left of the image, not over the actual picture.
That's the only solution I can offer.
However, the video looks fantastic!
~
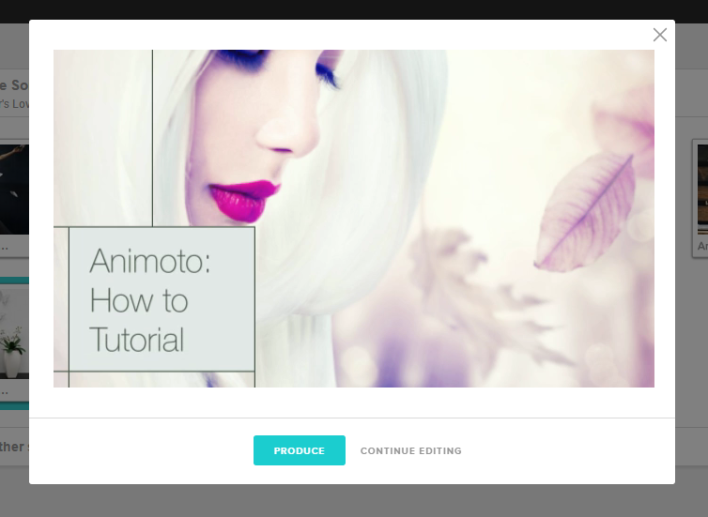
Once you're happy with the music, text and image placement, it's time to Produce your video. WARNING: Only do this if you're absolutely sure. You can't come back and re-edit your video later, once it's been produced.
But, if you're ready, let's go.
Click "Produce" on the preview box OR if you're on the images page, click the preview box and click 'Produce'.
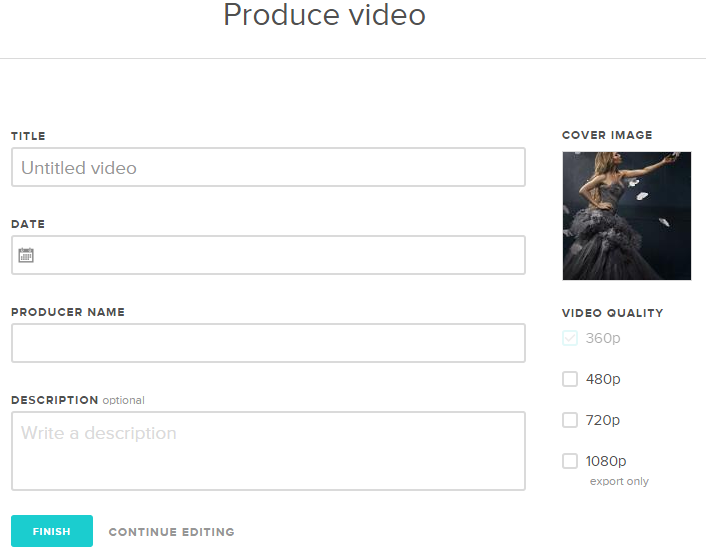
Now, I'm not techno savvy, so I won't be touching the Video Quality options. If you know what you're doing, you're welcome to choose whatever you want. I'm sticking with the recommended 360p.
As for the rest, the Producer Name has been removed, as that's the name of the account I'm using. So whatever account name you opened it under will already be in that box. You don't have to change it unless you want to. The Description is optional, but a great place to add your book blurb, if you choose to. The title is up to you, but I recommend saving it under the name of your book, especially if you're sharing the account with others. As for the date, change it to the date you completed the video, if you want.
~
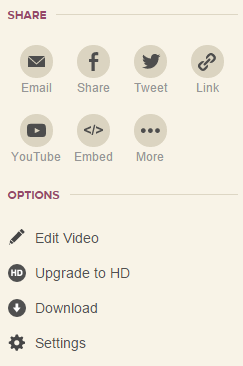
And there you have it! Your very own book trailer. Music, images and a beautiful piece of art that you can share with your fans. It will save to your computer automatically, but you're welcome to share it to FB, Twitter or whatever other options Animoto offers:
~
Happy Video Making!
No comments:
Post a Comment