Showing posts with label how to. Show all posts

Wednesday, February 24, 2016

Author Tip: Portfolio

Every author should have a portfolio of work. Whether this is just a website or an extensive paper form, there are really cheap ways to do this, that still look profession. Why is it important? Because your readers need a way to view your work and get to know you. Also, it's good to keep in mind that a lot of people don't have Facebook, so try to make yourself available on as many avenues as possible.

Today, I'm going to talk about a paper portfolio. This is great for book signings or just something to carry in your bag, for those moments when you're asked about your work. It's so much easier to get someone interested in your books if they can see a cover or read a blurb, immediately  than it does to show them a business card. Inevitably, they get shoved in a pocket/bag and forgotten about. Visually, it's harder to forget a great cover or a phrase from a blurb that intrigued you. People are, scientifically, more likely to remember something they see than something they're only told about.

~

My recent project was to take one of those booklets that come with collectable cards and turn it into a portfolio.

How? Well, it's pretty easy. It does take up a lot of paper (plain or photo - your choice) and lots of printing, but it's well worth it. Plus, you end up with a visually pleasing booklet of your work, that is protected from damage, greasy/dirty fingers and wear and tear.
I got mine recently, from the Minions explosion that's been happening. It was easy to pick up the "starter pack" which was a magazine, with cards and the binder. I did this for the binder, because it's cheaper to pay £4-£5 for this starter pack than to try to find one available elsewhere. These packs are aimed at kids, with pocket money, while individual items are aimed at adults who make a wage. Unfair, but true. Plus, you can gift the rest of the pack to a family kid, so it's not a total waste. (You can buy these in most newsagents/news paper stores, especially supermarkets, at the magazine section)

~

After buying your pack, it's a simple matter of taking measurements. I measures the Minions insert, for the front cover and the size of one of the cards, for the inserts inside. As it's designed for individual cards, you can actually fit +250 inside one book. This is great, because my plan is to make 1 card for the series/book with the blurb on it, then one card with the book cover. When you don't have much to put in it, you can fill the back with extra business cards (to hand out), character cards and extras, that are all easy to fit in the slots, for those emergency moments.

So, the measurements for this Minion pack are as follows:

Front/Back Cover = W: 14cm H: 19.2cm
Inserts = W: 6.2cm H: 8.8cm

I'm sticking with this, as this allows some wiggle room on either side as well as being accessible if they need changed or rearranged. I'm also arranging mine my series, as there's so much space.

If you're using another size of folder, you can convert to pixels (which Picmonkey uses for size) here at Unit Conversations.

~

Phase 1: Front and Back covers

The front cover will be simple: my logo, with a background of some sort, on the front. On the flip side, will be my bio. The back cover will be similar: an image related to me or my writing, then on the flip side, a list of all my books. These two pages can be updated as and when needed.

Example:

Cover 1 Cover 2 Cover 3 Cover 4

~

Phase 2: The guts.

For this, I'll be making one Blurb for each solo novel or for each series. Then I'll make one card for each book cover in that series or for that novel.

Example:


 I have to print, to check that the writing can be read on the blurb. But, the great thing is that it's easy to fix.

~

Phase 3: Insert into Doc

The easiest and simplest way to print these is to insert each into a word document. Keep them at their natural size, but if they change, it's easy to right click each picture, to re-set the size to the above measurements.

~

Phase 4: Print

You can do this on photo paper (for that clear, crystal, professional look) or on plain paper. As this will be an every day item, for events, hopefully manhandled a lot, and in a protective cover, the choice is totally up to you. You can be economic, in using plain paper, knowing that you might have to update it a lot or that it might get dirty. Or you can go all out with the photo paper for a sturdier book.

~

Phase 5: Share!

Take it with you everywhere. The size of this little book makes that easier on you, since it's not a massive A4 folder. Even if it's just to have those extra character cards or business cards on hand, it will always come in handy.

Enjoy!

Friday, February 12, 2016

How to: Make an Audio Book Using ACX (Step-by-Step)

Reblogged from Mike Fishbein

~

The Amazon Kindle ebook market is getting more crowded by the day and it’s increasingly difficult to stand out. No matter how good your books are, there are a lot of fish, both big and small, to compete with.
One of my solutions to drawing a wider audience has been to turn my ebooks into audiobooks. Doing this helps me to tap into a whole new audience on Audible who, otherwise may never even have heard of me, adds more versatility to my current products, and boosts the professional image of my book pages.
I now reach more people than ever before and am able to serve a whole new sector of potential customers who prefer listening to audio over reading.
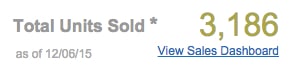
Creating audiobooks boosts the professional image of your book on Amazon, not to mention, you get a $50 bounty from Amazon if yours is the first audiobook an AudibleListener member buys. So far I’ve sold over 3,000 audiobooks and have earned over 30 bounties.
audibooks sold acx
In this post, I’ll walk you through the whole process of how to make  an audio book using ACX. I’ve captured and detailed every step involved from converting your book to auditioning and working with the best narrator for the job. By the end of reading this you will be well on your way to reaping the benefits of a whole new market. Log in to ACX now and follow along as you read.
Step 1: Go to www.acx.com
How to Make an Audio Book
Log in or sign up at www.acx.com and enter in either your book title, ISBN, or author name. Amazon will then search Amazon.com for rights you might have using your name.
How to Make an Audio Book
If this is your first audiobook or even if you have created a few already, ACX provides some very helpful guidelines to get you started. Read them to get an idea of the process.
Step 2: Select Your Book
How to Make an Audio Book
Select the book you’d like to turn into an audiobook.
Step 3: Choose the best narration option for you
How to Make an Audio Book
Here you get to choose whether you are looking for a narrator, have already converted you book into audio and just wish to sell it, or if you will be doing the narrating yourself. I outsource my production so I select the first option.
Step 4: Agree to the terms
How to make an Audio book
Read through ACX’s book posting agreement carefully before continuing. Each time you turn a book into an audiobook using ACX, you enter into a separate agreement.
Step 5: Enter your book description
How to make an audio book
Provide potential Audible listeners with information about your book, giving them a sense of the content and value for readers. It’s best to just use your Amazon book description for this.
Step 6: Enter your copyright information
How to make an audio book
Confirm yourself as copyright owner for your original book as well as for your audio book. For the copyright year, enter in the current year.
Step 7: Select a category
How to make an audio book
First indicate whether your book is fiction or nonfiction and then select the category most suited to your book.
Step 8: Specify narrator voice
How to make an audio book
Here is where you specify what type of narrator voice you want. Give some careful consideration to tone, accent and gender as this will influence how readers interpret your message. For my books I tend to stick to the above requirements.
Step 9: Add in additional comments
how to make an audio book
Add in additional comments that give narrators a good indication of who you are, your accolades, the value of your book, and who your target readership is. Get narrators excited to collaborate with you!
Step 10: Add an audition script
how to make and audio book
Either type in or upload an audition script to get the best narrator fit for your book. Do you want to hear how well they tell stories? How captivatingly they retell facts or data? Can they get your unique sense of humor across? Choose a script which will give you a good sense of the narrator’s scope.
how to make an audio book
If you prefer, you can upload your script. Make sure it is in either Word, PDF or TXT format.
Step 11: Enter your book’s word count
how ro make an audio book
Once you enter your book’s word count, you have finished the first section of how to create an audiobook using ACX and we are on to next: Distribution. This is where you will set the parameters for the distribution of your audiobook. To start, type in your book’s word count.
Step 12: Specify your territory rights
how to make an audio book
Unless you have a limitation on the areas your book is allowed rights within, select “World”. Choosing this means you have permission to sell your audiobook in every country.
Step 13: Select payment method
how to make an audio book
Select how you wish to pay your ACX narrator. You can choose either a revenue share model or a pay-per hour production fee. If you are unsure which one you want, select both for now and make a final decision once you have secured a suitable narrator.
Step 14: Select distribution type
Choose between exclusive or non-exclusive. I prefer the exclusive option. The royalty percentage is higher and I prefer to have all my books and audiobooks sold in one place.
how to make an audio book
Next, click save and continue to move on to the final section in the process.
Step 15: Review and post
013 review and post part 13 see info below
Ok, now we are on to the third and final step of creating an audiobook using ACX: Review and post.
how to make an audio book
Click “Post to ACX” so narrators can pick up your script and start auditioning for your audio book. The sooner you do this, the better!
Step 16: Review auditions
How to make an audio book
Now comes the fun part; narrators will start auditioning for your audiobook. You will receive an email notification each time a new audition comes through. I usually wait about 5 days to let them come in. If you have a specific narrator in mind, you can invite them to audition for your book.
Step 17: Click on New Auditions
how to make an audio book
To listen to the auditions, log in to your ACX profile and click “new auditions’ in the top menu bar.
Step 18: Listen to unheard auditions
How to make an audio book
You will find all the auditions you haven’t listened to yet in the right sidebar.

How to make an audio book
The listening process is simple on ACX. Click on the play button to listen to the audition and then click either “like” or “dislike” depending on your preference.
Step 19: Set your schedule
how to make an audio book
Once you have decided which narrator you want to use, and alerted them, set your schedule to indicate what timeframe they have to work within. This must include edits and correction time.
Step 20: Choose a payment method
make an audio book
This is where you decide whether to choose a royalty share or pay for production method. So if you were previously unsure and selected both, this is when you will need to make your decision. Discuss it with your narrator to see what suits both of you best.
If you’re paying, you have to coordinate with your narrator and most likely pay via PayPal. If you select the royalty share option, ACX will handle it.

make an audio book
Before you send your payment proposal off, click “preview” to check it’s correct.
Step 21: Send offer
Make an audiobook
Once you are happy with your payment proposal, click “send offer” to send it off to your narrator.
Step 22: Send your narrator the manuscript
audio book creation
Once your narrator has accepted your offer, the first step in your collaboration is to send them the manuscript for your audio book. Click “In Production projects” to bring up the tab below.
make an audio book
Here you can select the manuscript you wish to send your narrator. Click on the title and then click browse to upload it. Your manuscript must either be in Word, PDF, or TXT format.
audio book
Your manuscript will then have been sent to your narrator. Now you need to wait for them to review it and record the first 15 minutes which they will then upload for your approval.
304 all set wait for first 15 minutes from producer
Step 23: The first 15 minutes are ready for you to hear
301 review first 15 minutes get email and visit production tab
Your narrator will review your manuscript and record the first 15 minutes of your audiobook as a sample for you to listen to. You will receive an email notification when it is ready for you.
Step 24: Listen to the first 15 minutes
303 listen to first 15 minutes and if good approve
Click “play” to listen to the recording and select “approve” if you are happy with it. If you have queries or concerns about it, you can click “send message” to contact your narrator.
Once you have listened to the recording and clicked “approve”, sit back and relax. You will need to wait for your narrator to finish recording the rest of your audiobook. You can check the “produce audiobook” tab to see if any files have been uploaded.
Step 25: Create or upload your cover
400 cover art requirements
While you are waiting for your narrator to finish recording your book, you can create your audiobook cover. The image and technical requirements can be seen above.
Step 26: Covert book cover to ACX format
401 get covers converted to acx on Fiverr
I use Fiverr to convert my cover images to ACX format.
Step 27: Upload cover art
401 upload cover art
Once I have converted my image and saved it to my computer, I click here to upload my cover image.
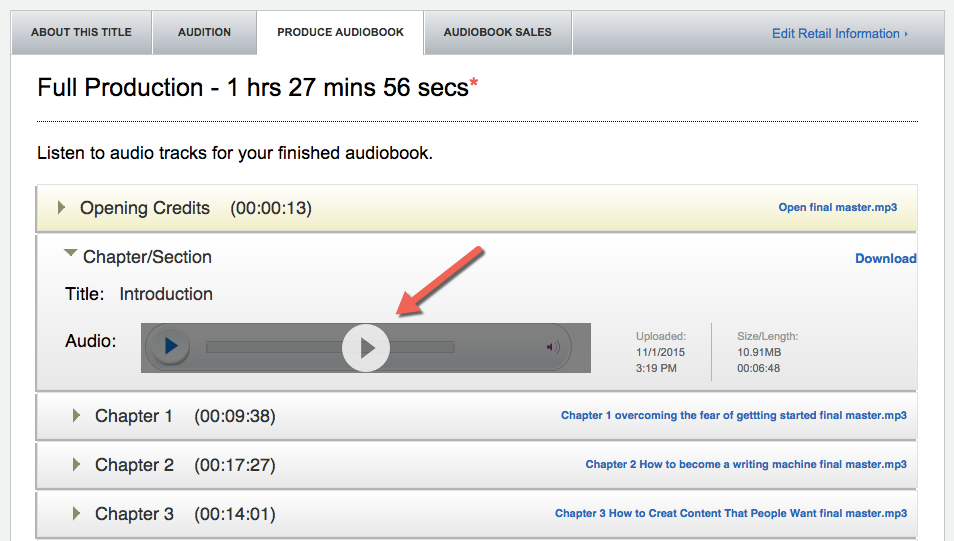
Step 28: Do a final review
600 receive email notification click on review
You will receive an email notification when your audiobook is ready for a final review. Click on the link to open it up.
601 listen to all tracks to make sure they sound good
Listen to each chapter separately by pressing the play button on the track you want to hear. If you’re not quite satisfied with it yet, you can request more changes from your narrator.
602 after listening approve audiobook if everything is good
Otherwise, if it’s good to go,  click “approve audiobook”.
Step 29: Wait for the quality assurance checks
603 confirm and youll get an email heres whats next
Once you have confirmed the audiobook, you will receive an e-mail with the above information. This clearly lays out what the next steps will be. You just have to confirm your bank information and wait.
Step 30: Your audiobook is now live
(Image Screenshot for amazon)
A week or two later, you will get an email confirming that your audiobook is now live on Amazon and Audible!
901 we are live on audible
Once your audiobook is live, make it a habit to regularly check back to yourdashboard to see how your sales are doing.

Key-takeaways

Making an audiobook using ACX is a great way to stand out in a competitive market. You can reach a whole new marketspace of Audible listeners and cater to customers who prefer listening to audiobooks rather than trying to make time in their busy schedules for reading. Providing both ebooks and audiobooks (and paperbacks too!) boosts your professional image as an author and adds another stream to your passive income.

~

Friday, February 5, 2016

How to: Be Better Organised: Step 1

I have a hard time keeping all my ducks in a row, so I downloaded Simple Sticky Notes, which is an awesome app-thing that you can download for your laptop desktop. It's really easy and simple to use. It's like Post-Its for your desktop, that you can edit, and get themes (designs) for, as well as changing the colour, size or font of, to your hearts content. No pen and paper here.

Step 1:

Step 1 in this process is to download and install Simple Sticky Notes.

Step 2:

Create a bunch of notes, even if you don't have anything to put in them yet, though I find that hard to believe. What do I use mine for? Well, I have one for my book's SmartURLs, which include everything from the Amazon, Barnes and Noble, book trailer and Goodreads page links, as well as a little diddy about "available at all ?? stores" so that I can copy and paste, without much effort. I have another one for my publishing schedule, one for my FB passwords (since I'm the admin on 3 FB, 3 Twitter pages and 3 blogs, which all use different passwords). I have one for my editing schedule, one for general To Do items, one for my CreateSpace discount codes, one for my DWP information, one for blog post ideas, editing tips. Anyway, you get the idea. I have a lot: 16 post-its in total and it was getting a little hard to organise them, which is when I came up with this idea.

Step 3:

Go to Picmonkey and create a Collage. It doesn't matter what images you add, yet, but have some random, decently sized boxes, scattered all over your page. Make sure your overall size (which you can manipulate with the lock box at the bottom) is relative to your computer screen. Tip on how to discover this: right click your desktop, click Graphic Options, then Resolution and check which box is ticked. That's the size you want your image to be.
This is mine: (I only thought about doing this post after it had been created, so I don't have all the boxes left over)


Right, now we can get to work. STAY in Picmonkey.

Step 4:

Either remove all the images you used, to create the collage or keep the ones you want and get rid of the rest. Now, we're going to fill in some of the blanks (on my sheet) and the boxes on yours. You can choose whatever boxes you want to fill in, but mine will be the four without box marks and two of the small square boxes at the top. One will be the second in from the right and the other will be the third in from the left.

It will take some time to upload images the right size. If you can't get them to fit, but really want to use them, consider switching to Pixlr, (I have a tutorial on how to use that here.) which will give you more free reign over how to manipulate the size of the photo. But, be warned, that it might not look as good.

Step 5:

Step back and look at your pretty. If you're happy with it, then save it. If not, play around a little more. You should have something like this (in your own configuration, with your own images):


Step 6:

Go to your desktop, click Personalisation, click Desktop Wallpaper and make this your wallpaper.

Step 7:

Use your sticky notes to fill in the blank boxes. I leave most of mine open, so I can always see what's inside them, but if you double click the title of the individual stick note, you can minimise anything you don't need to see all the time. Example: (I've blanked out personal info, spoilers for future books or current edits and one 18+ image, but you get the idea.)


~

Now, every time you see your desktop, all of your information information will be there, but you'll also have some pretties to look at, which will detract from the copies amount of words. Believe me, I've tried a dozen ways to make an effective, but useful, wallpaper and this was my best idea yet. Everything is organised, easily accessible, but also nice to look at.
Enjoy playing around with the idea.